As development in IP camera technology progresses most camera manufacturers look to support both a wide range of integration and recording platforms and, in most cases, a wide range of web browsers in order that their cameras can be set up, configured and viewed over the network.
In the case of browsers, inherent limitations still mean that certain functions must be accessible or controlled through a browser add-on – a small plugin, usually downloaded from the camera itself, which extends the capabilities of the browser. Some manufacturers have done away with this in order that their products are supported similarly in all browsers. Some have no full cross-browser support of any kind (products from Taiwanese manufacturer ACTi for instance) and require the use of Internet Explorer and an ActiveX plugin.
Installing ActiveX in those situations where it is necessary can be a difficult experience and it’s something our technical support team are frequently asked to help out with. A process which should, in theory, be simple, is subject to varying conditions like operating system, whether the ActiveX control code is signed or not, what your browser version and settings are and what permissions you have both in the browser and on the PC (I say PC since ActiveX controls are only for Internet Explorer browsers running on Windows PCs).
In this HOWTO I’ll demonstrate the installation of Axis Media Control, Axis’ ActiveX component.
Installing Axis Media Control in Internet Explorer
Installing the component can seem more difficult than it actually is, so I will talk you through the installation step-by-step. For this demonstration, I will be using an Axis P3343 and Internet Explorer version 9 on the Windows 7 operating system. Please note that for Windows XP the method is almost identical but the pop-up messages may differ slightly.
I will assume you know your camera’s IP address or have discovered it through the Axis IP Utility, have clicked to get to the camera and are now connecting to the web interface of the device using Internet Explorer for the first time.

Step 1 - Login to your cameras dashboard
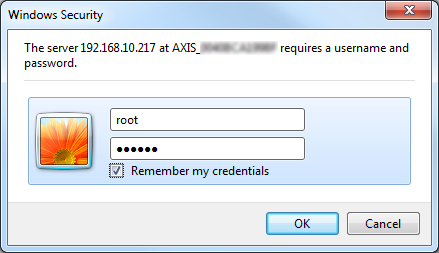
Depending on whether you have accessed the camera before you may be prompted to set the password at this stage. Please proceed with this step and then input the username and password on the next pop-up dialogue, as shown below.

I sometimes tick to save the login credentials as it makes life easier in the future. Just be aware though that anyone accessing the camera from the same computer won’t be required to input any authentication details if you decide to tick this – so it is a potential security risk. Once you have entered those details hit OK.
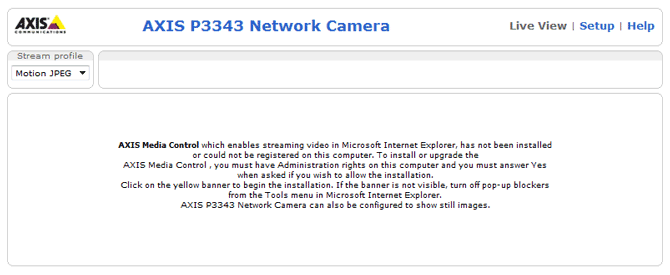
The next screen you’ll see is the camera’s interface. You can see from the on-screen message that one vital component is missing.

Step 2 - Allow Axis Media Control to be installed
Don’t panic though, If you look at the very bottom of the screen you should find a popup bar that has appeared advising that the webpage wants to run an add-on. This is asking us if we want to allow Axis Media Control to be installed on the PC.

Of course we do, so the next step is to hit allow.
Step 3 - Allow User Account Control changes
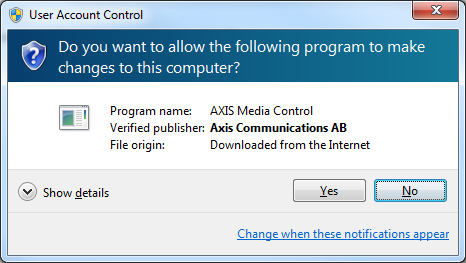
After a period of time the following window will appear, please be aware that depending on certain circumstances this may take some time so please have some patience. We’ve seen it take up to a minute to appear (an absolute eternity when you’re trying to get things done!).
Let’s state this part again – after clicking “Allow” it may take up to a minute before the next screen appears. Be patient and the dialog will appear.

Finish
Once the window pops up, hit “Yes” to continue with the installation. The Active X component will then be installed and shortly after you will be viewing live footage from your camera and have access to new capabilities available only through the ActiveX control.
The ActiveX installation procedure is generally the same regardless of manufacturer.
Axis Media Control comes installed with Axis network cameras.


