IP cameras can send you email notifications on alarm or at scheduled intervals, but to do this they require access to a SMTP server to send the email. Most email accounts come with SMTP access for outgoing mail but not all of them are easy to integrate with your IP camera because they require a secure connection.
This guide will walk you through setting up SMTP settings in an Axis IP camera with a GMX email account. This guide uses an Axis M1011 IP camera but most Axis IP cameras have pretty similar settings.
Setting up SMTP settings on Axis IP Cameras
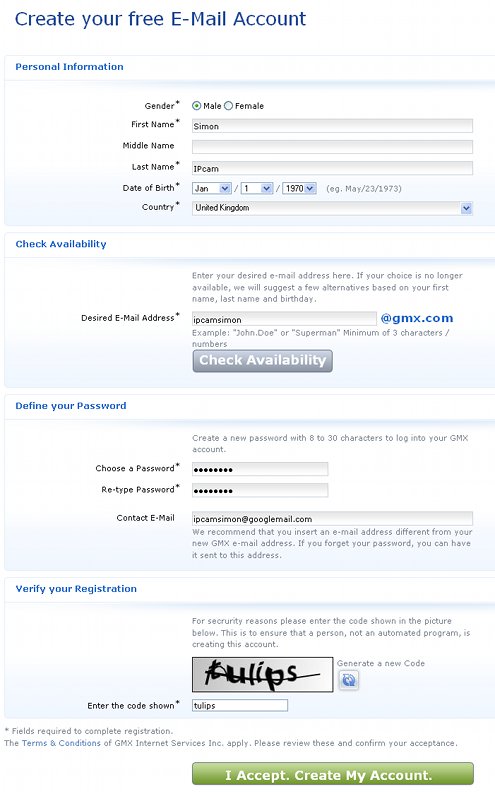
Step 1: Setting up an account with GMX
GMX offers a free account which is ideal for sending email notifications from your camera. Click ‘Sign Up Now’ to begin the registration process.

To signup you need to enter your details, choose an email address, password and verify the information in the box. Click ‘I Accept. Create My Account' and the next page should confirm your account has been successfully created.
Note: You will need to remember your username and password to enter your camera.
Step 2: Entering GMX account details into your Axis IP camera
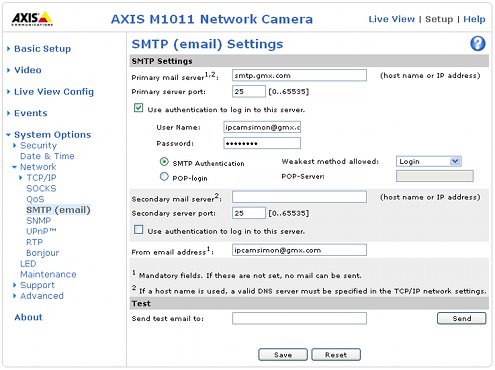
Login to your Axis camera and click ‘Setup’. On the left select ‘System Options’, then ‘Network’ and then ‘SMTP (email)’.

- Primary mail server: smtp.gmx.com
- Primary server port: 25
- Use authentication to log in to this server: Tick this box
- User Name: Enter your GMX email address in full
- Password: Enter your GMX password
- From email address: [email protected]
You can now enter a different email address in to the ‘Send test email to’ and click ‘Send’ to test your settings are correct. Click ‘Save’ to store your settings.


