Note: the products mentioned in this article are no longer available. This article remains online for information purposes only and is not relevant for modern IP cameras. NW no longer recommends the use of FTP as a means to transfer video or image data.
From the setup pages in your Axis 207 camera you may be forgiven for thinking that it's only capable of sending images by email based on motion detection, but can it send a constant stream of images to a server using FTP? Well, yes it can, it's just a little trickier to achieve but we are here to help.
Let's get started.
Our example will help you configure an Axis 207W to continuously send 1 image per second to an FTP server, the image being continuously overwritten.
This guide will be suitable for the following Axis Network cameras:
- Axis 207
- Axis 207W
- Axis 207MW
It may also work with the Axis 206, however, this is untested.
Note that this will also work for all Axis cameras above the Axis 207 but they have the facility to configure scheduled FTP events through the built-in web pages.
Before you start you may like to delete all previously configured events in the camera so the Events, Servers and Actions all have the same identifiers as our example below.
Step 1 - Adding an FTP server
- Log in to your camera and enter the 'Setup' pages. Choose 'System Options >> Advanced >> Plain Config'.
- Select 'Event Servers' from the drop-down box.
- Click 'Add FTP Eventserver'. This should give you a new FTP server titled F0.
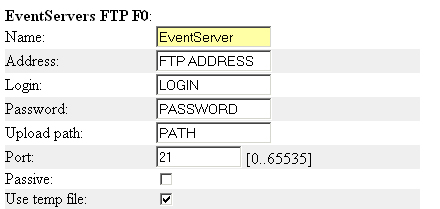
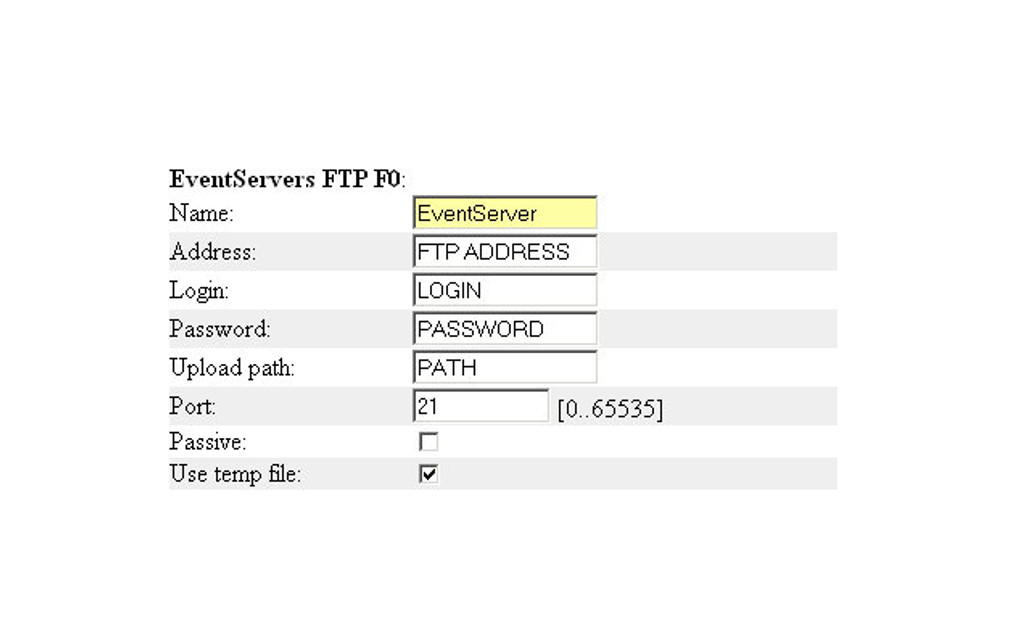
Now, enter your server details in the form and save. You can see an example image below. Of course, you will have to populate the fields with your own server details.

Step 2 - Adding an Event
- Log in to your camera and enter the 'Setup' pages. Choose 'System Options >> Advanced >> Plain Config'.
- Select 'Event' from the drop down box.
- Click 'Add Event Type' button. This should give you an event titled E0.
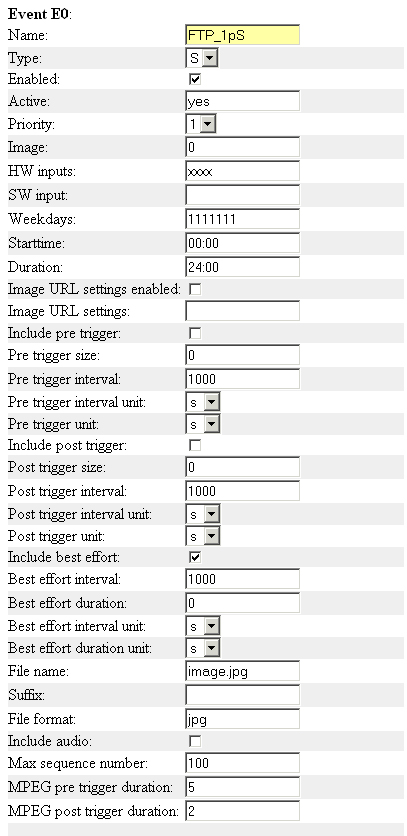
lot of the values will already be populated. Match the values as shown in the image below for the correct configuration (although the name is not important), and save.

Step 3 - Adding an action to the event
The event won't work without an action and unfortunately there is no way to add an action using the web pages. We need to put a command directly into the camera using the API (Application Programming Interface).
To add an action enter the following line in your browser's address bar:
http://[camera IP]/axis-cgi/admin/param.cgi?action=add&group=Event.E0.Actions&template=ftpaction
Where [camera IP] is the address of the camera and E0 represents the newly created event in Step 2.
You should recieve the message " A0 OK" if successful.
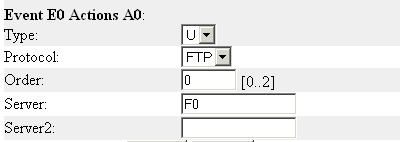
Now go back to the event as in Step 2 and you will notice that action A0 has been added to the bottom.
See the image below for the correct values to enter for the action.

hat's all there is to it. Now restart the camera and keep an eye on your FTP server to see your image.
If you have any comments or questions about this guide please get in touch and we will do our best to answer them as soon as possible.


