To access your camera over the internet you need to know the IP address of your external internet connection this is known as your public IP address. Most domestic ISPs will provide you with a dynamic public address which means every time you connect to the internet you will get assigned any available IP address. This means that it will regularly change. So to keep track of what IP address your internet connection has you need a dynamic DNS service.
All Panasonic IP camera models starting with BB and BL come with free registration to Panasonic’s Viewnetcam dynamic DNS service which is regularly updated by your camera. The Viewnetcam service then provides you with a domain name to link to the current IP address of your internet connection allowing you access to your camera.
This guide walks you through setting up the Viewnetcam service with a Panasonic BB or BL IP camera. The screenshots taken in this guide are of a BL-C131 but are going to be pretty much identical for most of the BB and BL range of Panasonic IP cameras.
Setting up Viewnetcam with Panasonic cameras
Step 1: Camera settings
Login to your camera and click ‘Setup’ on the top tabs and then click ‘Dynamic DNS’ from the left (some cameras may say Viewnetcam.com depending on model/firmware)
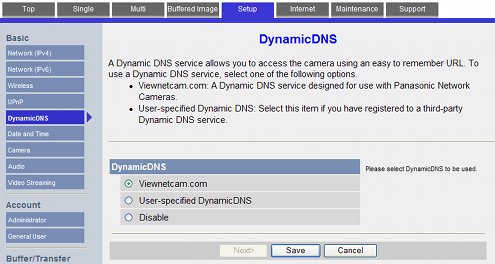
Select Viewnetcam.com and click ‘Next>’ button (cameras with the Viewnet.cam selection will not have this screen)
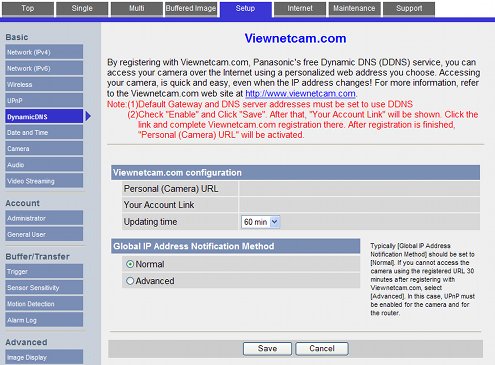
Leave everything as default and click ‘Save’ button.
A box will pop up to confirm setup click OK.
Next screen will say success, click ‘Go to Vienetcam.com page’ button
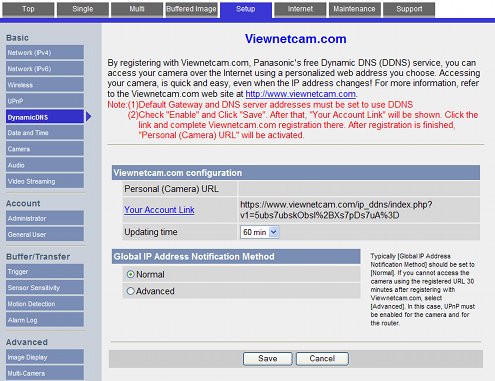
This won’t take you to the Viewnetcam website but return you to the previous webpage. Here click ‘Your Account Link’ which will open a new browser window and take you to the viewnetcam.com website.
Step 2: Registration with Viewnetcam
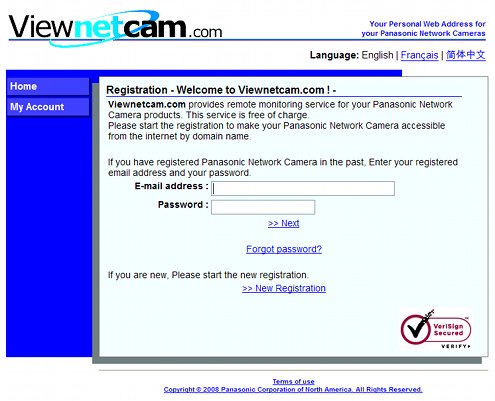
From the viewnetcam.com website click new registration.
Note: You can only register your camera through the link inside your camera you cannot just visit the Viewnetcam website.
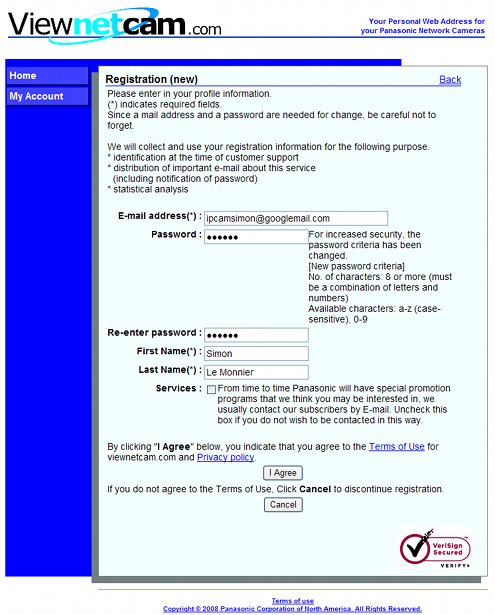
Next enter your details: Email address, password (8 or more characters including both letters and numbers), first name, last name. Uncheck the services box if you do not wish to receive emails from Panasonic and click ‘I Agree’.
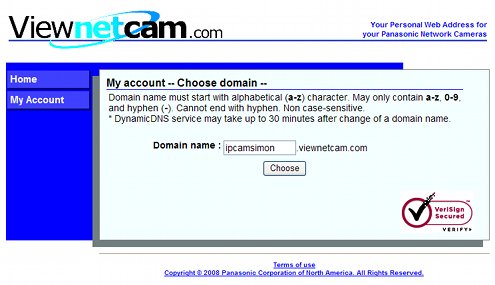
Now you get to choose the domain name that you will need to type to access your camera by entering it in the box (must only contain numbers, letters and hyphens ‘-‘) then click ‘Choose’ button.
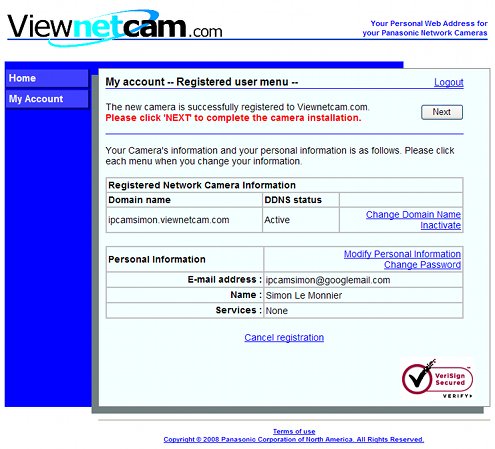
Now you need to confirm all your details are correct and click ‘Next’.
Viewnetcam will register your camera and details and then direct you back to your camera.
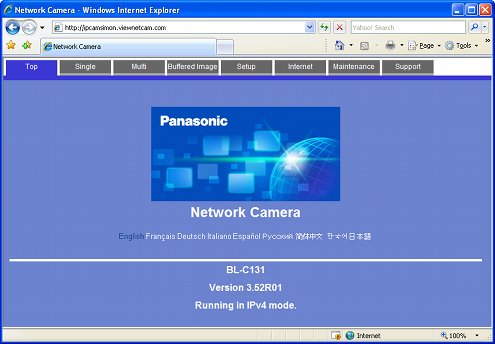
The Viewnetcam service can take up to 30 minutes to become active, but after that you should now be able to access your camera from an external internet connection using your chosen domain name. This is done by typing into a web browser: ‘your-domain-name.viewnetcam.com’.
Testing access to your camera needs to be done on an external internet connection. If you try to test it on the same local network it may be blocked by your router by NAT loopback which stops data going out to the internet and being directed straight back.


