Note: NW no longer recommends the use of the insecure FTP protocol. If image transfer is required consider using a video management system. If FTP must be used, consider a camera that can support SFTP. This article remains for information purposes only.
With the image transfer feature found in many IP cameras, you can store a number of images in a central location as an archive for security purposes or maybe for building a time-lapse movie.
These images are sent using the FTP protocol which stands for File Transfer Protocol and is normally associated with transferring files across the Internet. It also works equally as well on a local network and this guide will show you how to set it up.
Setting up an FTP Server
Step 1 - Download the FTP server software
We will be using FileZilla which is a free FTP client.
Step 2 - Setting up the FileZilla software
Once installed, run the program. You will see the following dialogue box when you first run the program:
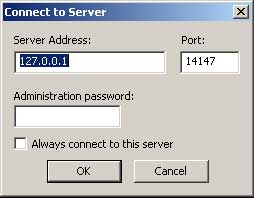
Server Address: We're running this on the local machine so this should be 127.0.0.1 (loopback IP)
Port: It's fine to leave it on the default setting of 14147. This only becomes important if you are configuring external access.
Administration password: Type in a password of your choice here.
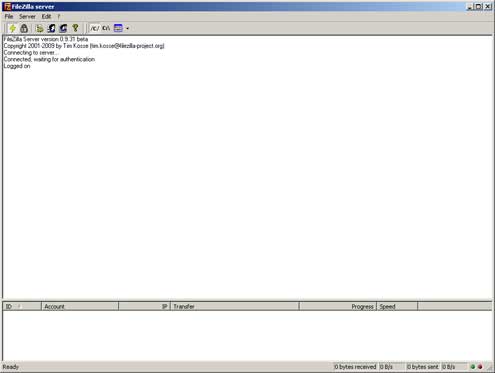
Click 'OK' to connect to the FTP server and you'll be presented with the following status screen:
Step 3 - Setting up a user account
Before you can start transferring files you need to set up a user account. To do this go to the 'Edit' menu and select 'Users'. You will see a dialogue box like the one below:
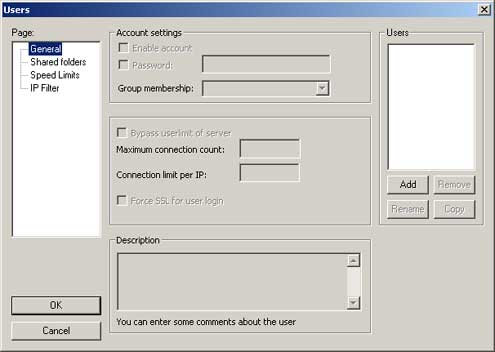
On the right-hand side in the 'Users' section click the 'Add' button at the bottom of the column to add a user. A dialogue box will pop up asking for the name:
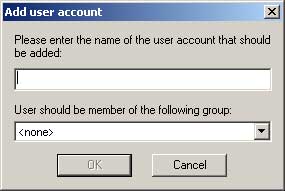
Enter the name of your user here and click the 'OK' button. We'll use the name 'Guest' in our example.
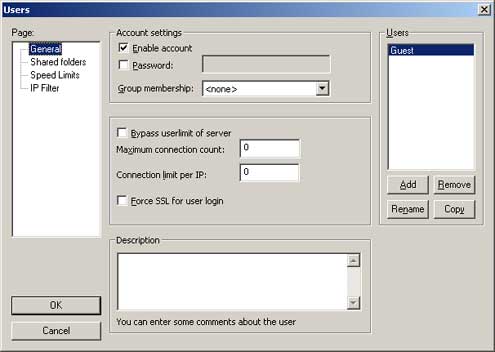
Your new user should appear in the 'Users' column on the left as can be seen in the above example.
The final thing we need to do is configure a password for our new user.
In the 'Account settings' section put a checkmark in the 'Password' box and enter a suitable user password.
Don't click 'OK' just yet, we're not done...
Step 4 - Setting up a shared directory
The final step is to set up a shared folder for the user. This is the folder you will use to store the images which are sent from the camera using FTP.
First, create an empty folder on your computer in a location of your choice (My Document, desktop etc.), you will use this as your shared folder.
On the same 'Users' dialogue box select the 'Shared folders' option on the left-hand side as shown below:
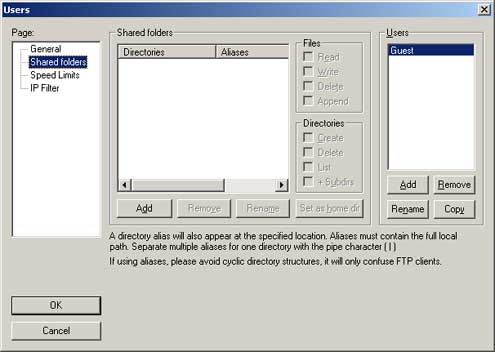
In the center of the dialog box, in the 'Shared folders' section click the 'Add' button to add a shared folder.
A pop-up dialogue box will appear allowing you to browse to a folder. Choose the empty folder you created earlier.
Now click 'OK' to save the settings.
Finish
And that's it. The FTP server is set up and ready to use.
When configuring the camera on the local network the FTP settings will be as follows:
FTP Server address: This will be the IP address of the PC or server running the FTP server.
Username: the username you created in Step 3.
Password: the password you created in Step 3.
One common use for FTP has been to store a repository of images which can be compiled into a time-lapse movie. As FTP is no longer secure, be sure to choose a more secure option for this requirement such as CamStreamer's Cloud Timelapse Subscription.


