Note: NW no longer recommends the use of port forwarding as technology has moved on and new access methods have become available.
Remote access is often a key factor when choosing the correct security camera for your needs. The ability to monitor a location remotely is a huge benefit for most and is often the main reason for selecting an IP camera.
However, the act of setting up remote access can often be very confusing for non-technical users and can lead to difficulty. The process is actually very simple but does require some explanation. Here we discuss, in the main, Port Forwarding. Note that while this method is still used a great deal it is no longer recommended as the best option for remote access.
Remote Access Steps:
- Basic camera networking
- Gather the right information
- Set a static IP address
- Setup port forwarding
- Testing
- Dynamic IP addresses
- Safety concerns - this is all safe... right?
- VPN
- Troubleshooting
1. Basic camera networking
Firstly we need to cover the basic setup of an IP camera.

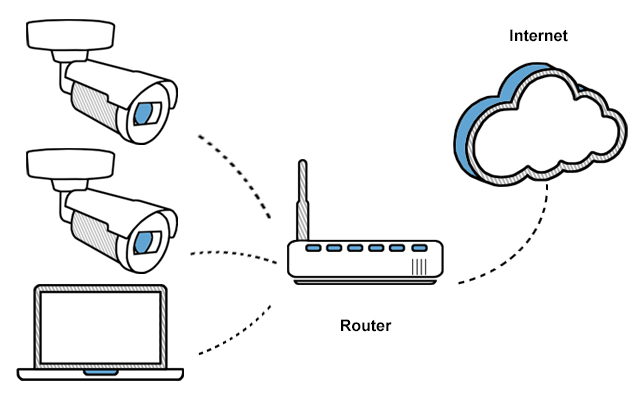
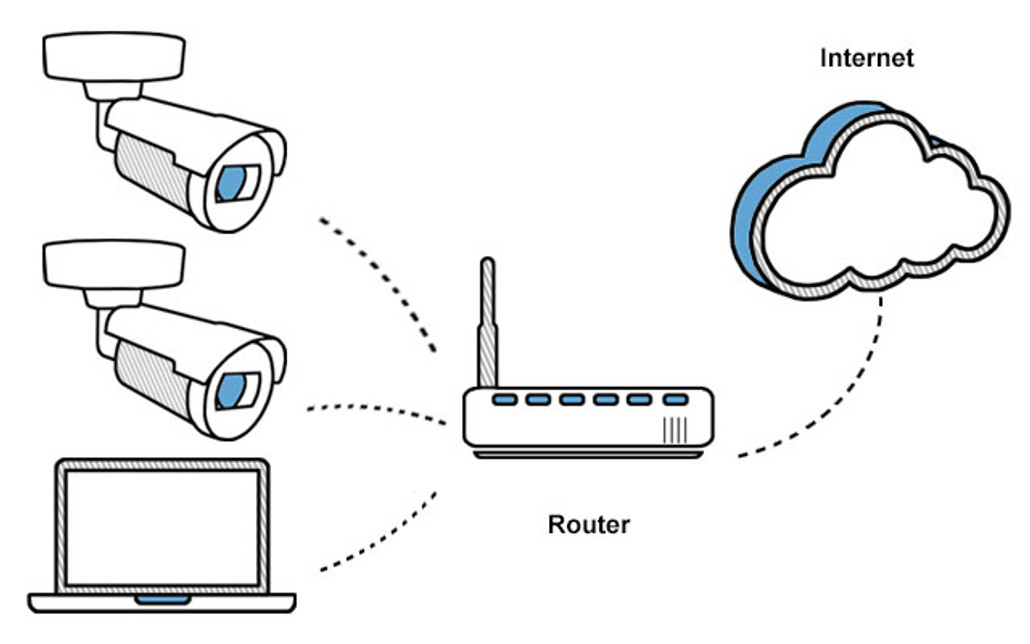
Most people will connect their IP camera to a standard Ethernet router alongside other computers and network devices. All devices will then gain access to the internet through the router. There are no restrictions on outgoing data unless you set them within your router.
However the same is not true in the opposite direction. Routers contain a firewall which prevents anyone using the internet from accessing your local network. This keeps your computer and local devices safe from attack by hackers but also means that you can’t connect to your camera.
Port forwarding (sometimes called port mapping or virtual servers) is the method which tells your router that you want to allow access from the internet to a device on your network without allowing access to other devices.
2. Gather the right information
In order to set up port forwarding you will need to gather some network information, namely the IP address of your camera, the internal IP address of your router, the external IP address of your router and the port number to be used. Use the following techniques.
The internal IP address of your router and subnet mask
To access this information in Windows XP, go to the Start menu and click on “Run”. In the box that opens, enter “cmd” and click “OK”. In Windows Vista and Windows 7, click the Windows icon and in the search box enter “cmd” and press enter.
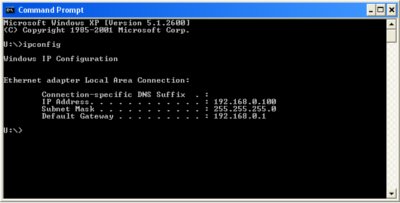
The Windows command window should now appear. Type in “ipconfig” and press enter. The computer will then churn out your network information for your computer. If you are using a wireless connection between your computer and router look for “Ethernet adaptor local Wireless connection”; if you are connected by a wire then look for “Ethernet adaptor local area connection”.
Once you have the right area, look for the default gateway. It should be something similar to 192.168.0.1. If you find more than one and cannot decide which one is correct, try entering the IP address into a web browser. Whichever is the correct IP address should bring up your router's web page.
In the command window, you will also see the subnet mask. Make note of this as you will need it later.

Camera port number
This is specified from within the camera’s web interface on the settings page. By default, the port number should be set to 80. If you are using more than one then you need to change this but otherwise, I would leave it alone. If you do want to change the port number it is best to choose a number over 8000.
The external IP address of your router
To get the current external IP address of your router, go to www.mycamip.com. Watch out though as this may change. See dynamic DNS below for details.
3. Set a static IP address
If you do not know what your camera’s IP address is you can usually find out by using the manufacturer's search software. However, by default, most IP cameras use DHCP to locate themselves on your network. This provides quick setup but also means that the IP address of the camera can change at any point. Once your port forwarding rule is set up, any changes in the IP address will break the rule and you will not be able to access remotely.
To prevent this, you need to set a static IP address in your camera. To do this, log into your camera and go to the network settings page. There should be an option there that says something similar to “Obtain an IP address automatically”. Un-tick this and enter a suitable IP address.
If you don’t know which IP address to use we would advise using the one that the camera is currently on. To check this, have a look at the address bar at the top of your page when logged into your camera. The address should be something similar to 192.168.0.253.
In addition to your IP address, you need to specify a subnet mask and default gateway. You gathered this information earlier so enter it as required.
You may also be asked to enter a primary and secondary DNS server. Unless you have been told differently by your ISP, enter the IP address of your default gateway address into the primary DNS server box. You can leave the second server blank.
Once you have all the information entered, save the changes and restart the camera. Test the IP address by typing it into a web browser once the camera has fully powered up.
4. Setting up port forwarding
Obviously, we can’t go through configuration on all routers, the keyboard wouldn’t take it. However, there is a common way to set up port forwarding on all routers.
Think of the port forwarding table on your router as a phone book. When you want to know which number to call you scan through the names until you find one that matches and dial that number. In this case, the router scans through the port numbers until it finds one that matches and then sends the information to that address.
When entering a port forwarding rule you are often asked to enter the start and end ports. With the camera being on a single port just make them identical. The same goes for external ports if you are asked for them. Some will also ask you what type of traffic you want to allow, either TCP or UDP. You should allow TCP.
Be aware that sometimes you have to set up a rule in two steps. In these instances, you have to create a service first which just adds a name for your ports before you specify an IP address. For an example of this take a look at our port forwarding a DG834 router guide.
Additionally, you can have a look at Portforward.com. This website offers visual walkthroughs of most common routers. Just select your model and select the default guide for a basic walkthrough of how it is done.
5. Testing
Once the rule is created you need to test it. To access your camera remotely type
https://external_ip_address:port
into a web browser. Note that if you are using port 80 you can leave out the “: port” and still access your camera.
Don’t try to connect yourself. You may encounter an effect called NAT loopback. Some routers do not allow you to access a local device using the external IP address of your router and will act as if the rule is incorrect.
The best way to check that port forwarding is set up correctly is to try from a friend or relative’s computer. Alternatively, you can check using a 3G/4G internet connection on your mobile phone, but be aware that these can sometimes provide inaccurate results.
6. Dynamic IP addresses
We get the same question a lot here at Network Webcams Tech HQ; do I need a static IP address on my internet connection? The answer in most occasions is no. Most cameras come with a dynamic DNS client which allows you to set up a unique name which will always point to your current IP address.
7: Safety concerns - this is all safe... right?
Allowing access through my firewall? That doesn’t sound safe! Well, although you are allowing access through your firewall, you are doing so in a very controlled manner. Anyone accessing the internet will only have access to the devices you have set up on the port forwarding screen and even then will only be able to access certain ports. For example, if you only allow access on port 80 you can’t access the same device over port 21.
However, because you have opened your camera up to the internet you do need to make sure that a secure password is used. Never leave the default password on your camera. It's really not that difficult to work out the model of the camera is being used and try the default password.
That said, it is very easy when setting up port forwarding to introduce security issues, so we tend not to recommend it as a means of remote access these days. There are other and better methods available.
8. VPN
As useful as all this is, times are changing and port forwarding is being phased out due to security concerns, which we mention above. A Virtual Private Network (VPN) is a secure, temporary (though can be made permanent) link between two networks. When remote access is required, those with a VPN available would first log into that VPN and then access the remote device as if it were on their local network. VPNs come in many shapes and sizes and can even be connected directly to and from IP cameras (such as Axis cameras with their ACAP platform).
9. Troubleshooting
No matter how many times you have set up port forwarding sometimes things do go awry. Double-check the settings you have entered and if necessary restart the router. If you still have problems take a look at the following areas.
Default Gateway
The default gateway is essentially the place where your camera will look to access the internet. If this setting in your camera is missing or incorrect, the camera doesn’t know where to send internet information to. In 99% of all network configurations, the default gateway is the internal IP address of your router. To confirm this address, check the network settings by using the cmd window as shown above.
Hopping Port Forwarding
I have seen a number of occasions where people have been using more than one router on the same connection. It’s always a bad idea using more than one router per internet connection unless you are a very advanced user. Keep things simple and it’ll be a lot easier to port forward. If you must use more than one router then you need to set up port forwarding on each device to pass information from one router to the next. This is very tricky and should only be used as a last resort.
Satellite links / ISP blocking
There are ISPs out there that block remote access on certain ports. It’s very common on GPRS and satellite links and will often prevent access from the internet completely. If you have a lot of trouble accessing it’s a good idea to give the ISP a call to confirm with them what you are doing is possible. Sometimes a change of port number to something other than 80 can sort things out.
NAT Loopback
A very common fault is encountered when people try to use the external IP address of the router to access their camera while accessing through the same router. This is often not possible due to NAT loopback.
NAT loopback happens when you try to access a local device using the external IP address or domain name. Some routers allow you to do this and some don’t. Check the user manual for your router as it should give you some indication. If Loopback isn’t supported then it will appear as if the system isn’t working.
The best way to check that the port forwarding is working correctly is to view from an external network such as one belonging to a friend or relative, or to use a GPRS connection or mobile phone web browser.
You should now have the information to configure and troubleshoot any port forwarding scenario. If you have any comments please leave them below.
Finally, customers having any trouble with connecting to your IP cameras or CCTV security system remotely please give us a call. We are here to help.


