Note: NW no longer recommends the use of port forwarding.
IP security cameras allow you to view your home or business from anywhere in the world with access to an Internet connection. To connect to your camera you need to know the IP address of your Internet connection that your camera is connected to. This is known as the ‘public’ IP address.
Most domestic ISPs allocate dynamic IP addresses which change each time you connect to the Internet. If this happens it will leave you unable to connect to your camera.
Axis Internet Dynamic DNS Service provides a way to continually access your camera even if your IP address changes. This is achieved by your camera updating the Axis Internet Dynamic DNS Service with its current external IP address and the service provides you with a unique domain name to link to the address.
This guide walks you through the setup process.
Setting up Axis Internet Dynamic DNS
Note - Accessing your camera from over the Internet may require port forwarding in your router.
Step 1: Camera configuration
Log into your Axis IP camera and click on setup
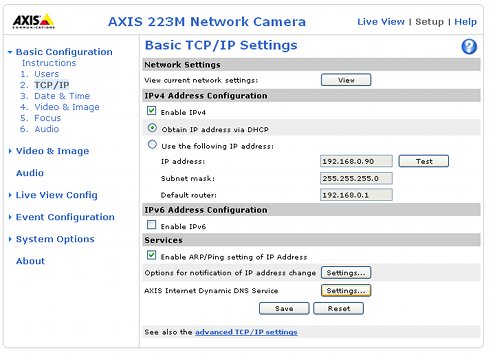
Under ‘Basic Configuration’ on the left, click TCP/IP. The main window will now show the Basic TCP/IP settings, under the ‘Services’ heading there is an option for ‘AXIS Internet Dynamic DNS Service’, if you click the settings button a new window should open.
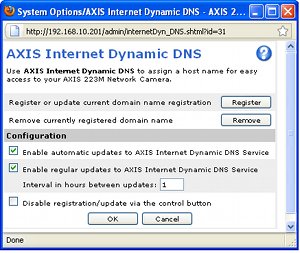
This new window contains all the settings for the Axis Internet Dynamic DNS Service. Tick ‘Enable automatic updates to AXIS Internet Dynamic DNS Service’, ‘Enable regular updates to AXIS Internet Dynamic DNS Service’ and enter 1 in the box for ‘Interval in hours between updates’. This will configure the camera to send regular updates to the dynamic DNS service, click OK to save these settings and the window will close. All settings have now been saved and the camera configuration is complete.
Step 2: Axis Internet Dynamic DNS Service setup
While still in the camera setup reopen the previous window by clicking ‘settings’ in the ‘AXIS Internet Dynamic DNS Service’ heading. This time click the ‘Register’ button to open the website for Axis Internet Dynamic DNS service.
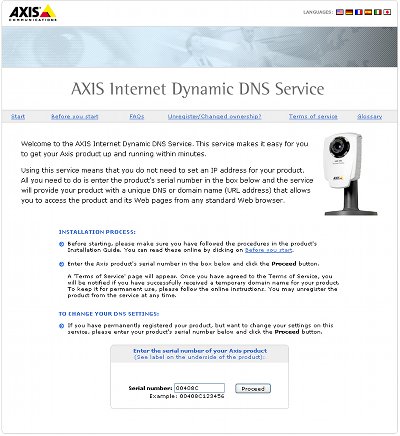
The website will ask for the serial number of the IP camera you wish to set up. This should already be entered. Click ‘proceed’ and you will receive a temporary domain name for access to your camera over your local network for 14 days without registration.
Note - If you need to find your camera’s serial number it can be found on the camera itself, on the box and in the setup menu (the MAC address of the camera is the serial number if you remove the colons).
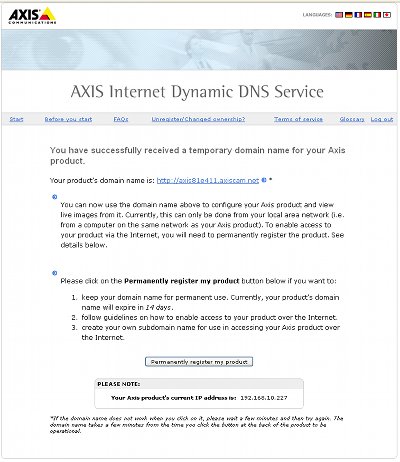
To set up a domain name for external access you will need to permanently register your camera by clicking the ‘permanently resister my product’ button near the bottom of the page.
If you have previously registered your details with AXIS you can use these details to register your camera. If not you will need to select a new user and register your details.
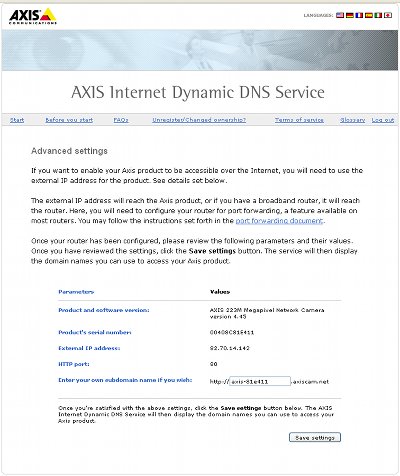
After registration, the advanced setting page is where you can customise the domain name used to access your IP camera. Enter your desired domain name into the box and click save settings.
Step 3: Testing
After successful selection of a domain name, you should now be able to connect to your Axis camera with your chosen domain name. However, this may only work on an external Internet connection. Routers have a feature called NAT loopback which stops traffic going out and being directed straight back, so test on a different Internet connection or ask someone else to test it.
You should now be able to view and log in to your Axis IP camera from an external IP connection. If you find you are unable to view your Axis IP camera you may need to set up port forwarding rules in your router to allow external access through to your camera.


