Note: this blog post does not apply to Axis cameras after firmware version 4.xx. It remains visible for information purposes only. See the current range of wireless IP cameras.
The great thing about wireless cameras is that they can be placed virtually anywhere around your home or business once they are set up. All you need is a power outlet and you're good to go. This of course gives you the freedom to place your camera in discreet locations which is ideal when using your camera for security purposes.
The setting up of any wireless Axis camera is a very straight-forward procedure and should only take a couple of minutes but the process can sometimes be jargon-filled and confusing for those who are non-technical. This is where this guide steps in to lend a hand.
This guide will take you through the process of configuring your wireless Axis camera for use on your wireless network.
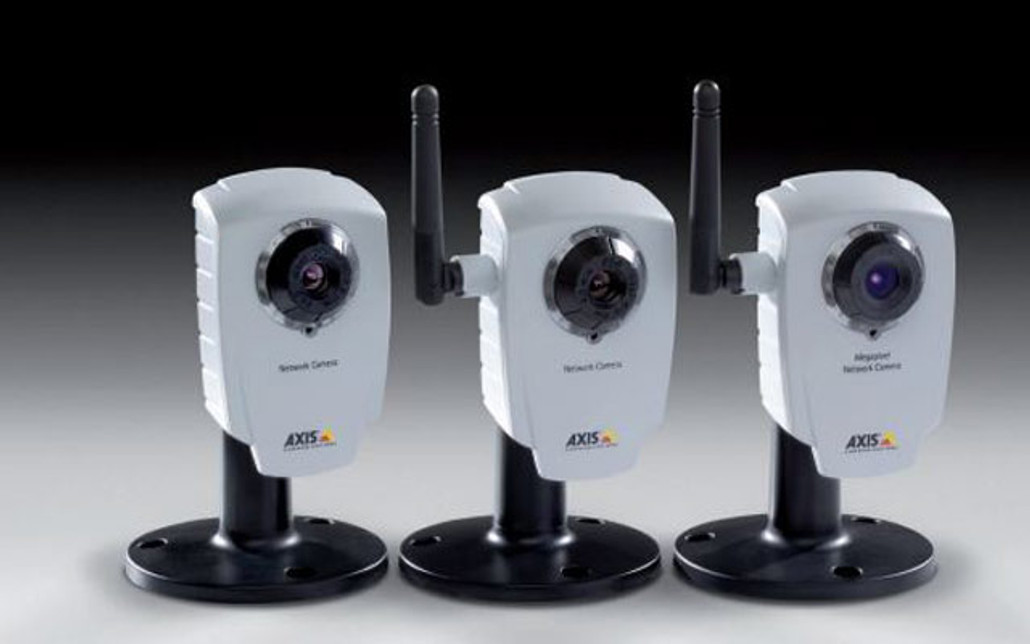
It is suitable for the following cameras: Axis 206W (now discontinued), Axis 207W, Axis 207MW, Axis M1011-W, Axis M1031-W, Axis 211W.
We will assume your camera is configured and you can access the camera on your network when it is connected with an Ethernet cable. We will also assume you are using a wireless router as your wireless access point.
Step 1 - Set the IP address
Any wireless Axis camera will have 2 IP address settings. One for when it is wired with a cable and one for when it is connected wirelessly.
We first must make sure that the wireless address in the camera is the same as the wired address. This means that the camera will have the same address if it is wired or wireless.
Where do I enter the address?
From the live view click the 'setup' button at the top right hand side of the screen to enter the camera's setup pages.
From the menu on the left click the 'TCP/IP' link under the 'Basic Configuration' heading to enter the camera's network settings page.
Ignore IPv6 Addresses for now, these are in the camera for future use, for now we are only concerned about the IPv4 address.
You will notice on the screen that there are two IPv4 addresses. An 'Ethernet' address and a 'Wireless' address.
You can set the camera to obtain the address automatically using DHCP but we advise you set them manually as this will save problems later when you set up Internet access.
To set a manual address, select the button 'Use the following IP address' and make sure the IP address, Subnet Mask and Default Router which are shown for the 'Ethernet' address are copied to the 'Wireless' IPv4 address.
Click the 'Save' button to apply the changes.
Step 2 - Set the SSID
The SSID (Service Set Identifier) is the name of your wireless network and it is very important. It is the name that appears when you use your computer to search for wireless networks in the area. If you do not set the SSID in the camera correctly you will never be able to use it wirelessly.
Where do I find the SSID?
You find it in your wireless router. Log in to your router and go to the wireless settings page. Your SSID should be listed there. IMPORTANT: The SSID is case-sensitive so if it is listed in upper-case on the router then it should be entered in upper-case in the camera. We would suggest you copy and paste the SSID from your router settings to the camera if possible to avoid error.
Where do I enter it in the camera?
From the live view click the 'setup' button at the top right hand side of the screen to enter the camera's setup pages.
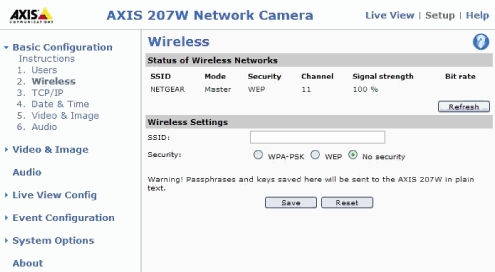
From the menu on the left, click the 'Wireless' link under the 'Basic Configuration' heading to enter the camera's wireless settings page.

Wireless settings for an Axis 207W (firmware version: 4.40)
Directly under the 'Wireless Settings' heading you will see the entry for the camera's SSID. Input your SSID in this box and click 'Save' to apply the changes.
Step 3 - Wireless Encryption
The final setting we have to consider is wireless encryption. This is the setting which keeps your wireless network secure from unwanted access by neighbours and people in your neighbourhood.
There are many different methods of encryption, some more secure than others.
Axis cameras support the majority of available encryption methods including:
WEP (64/128bit), WPA/WPA2-PSK, WPA-WPA2-Enterprise (EAP-TLS, EAP-PEAP/MSCHAPv2)
Because there are is so much variation when it comes to choosing wireless encryption, this guide cannot possibly go into details about how to set up each one. What we advise is that you examine and copy the exact settings from your router and enter these into the camera.
Where do I enter it in the camera?
As before, from the live view click the 'setup' button at the top right hand side of the screen to enter the camera's setup pages.
From the menu on the left click the 'Wireless' link under the 'Basic Configuration' heading to enter the camera's wireless settings page.
Make sure the wireless mode is set to 'Master', select which method of encryption you are using in your wireless router (WEP/WPA/WPA2) and enter the required key. The details should be copied from your wireless router. If possible, when it comes to entering your key we would advise you copy and paste it if possible.
Finish
That should be all there is to it. Simply unplug the Ethernet cable and restart the camera by cutting the power to it for 60 seconds and it should come back on connected to your network, wirelessly!
Mac Address Filtering
There is a another thing to consider when setting up your camera. In some routers to further improve security can be set to only allow specific devices to connect wirelessly. Every network device has a serial number known as a MAC address and this is unique to every network device. It is possible in every wireless router to restrict wireless access to only those devices you have on your network, effectively blocking everyone else. This is done by using MAC addresses and is known as MAC Address Filtering.
The reason this isn't covered in the main HOWTO guide is that this feature is not set up as standard in any router and requires configuration, therefore if someone has configured their router in this way they will know and already have taken this into consideration.
This is just a reminder to those who tried everything else but still having problems connecting.
Frequently Asked Questions
I have done everything but my camera still refuses to connect, what now?
We get this a lot and we find with the majority of people it's down to not entering the correct information into the camera. We would advise people check their settings remembering that the SSID is case-sensitive.
If you still have no luck consider the possibility that the wireless network has restricted access by MAC address using MAC Address Filtering. If you haven't configured this in the router yourself contact the person in charge of setting up the router. If no-one else has touched the router then chances are there is no filtering in place. If you still have no luck contact a member of technical support from the company you purchased the camera from for further assistance.


